Introduction
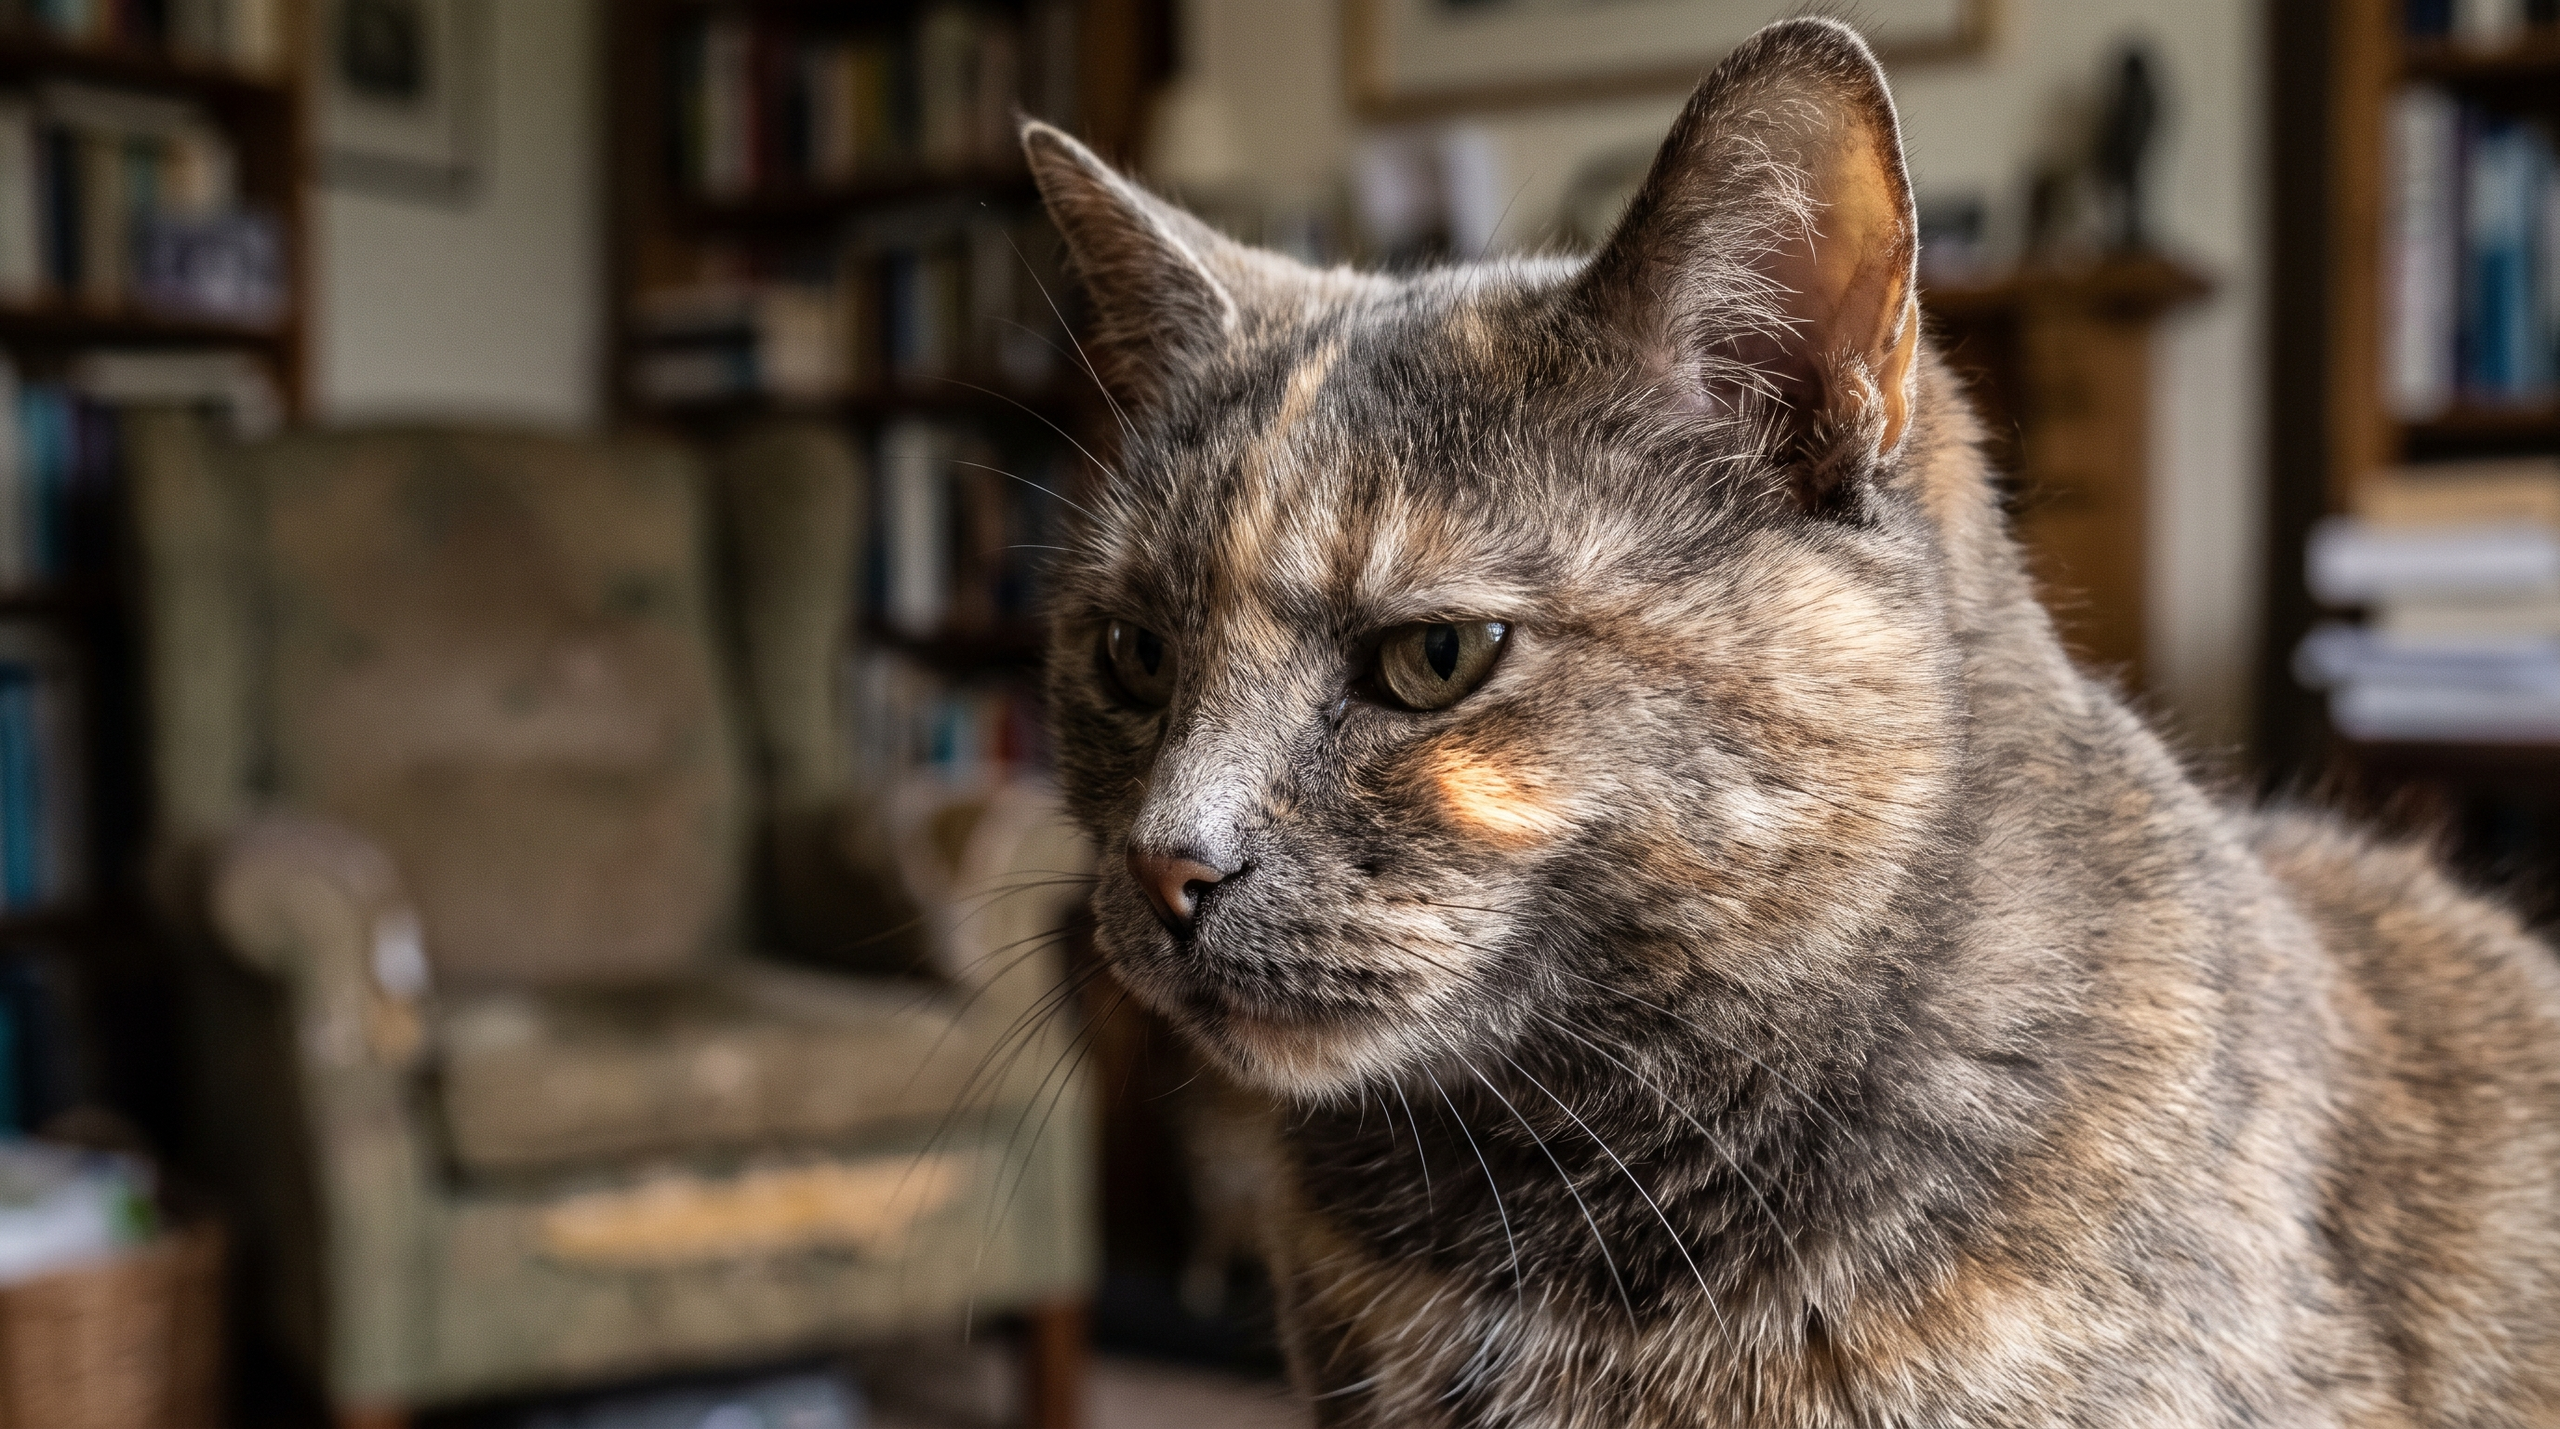
Here is the thing about cat photos: most of us have hundreds on our phones, but the one you love scrolling past is almost never the one that makes a great portrait. The difference is not the camera or the editing app — it is knowing what to look for before you even press the button. A portrait-worthy shot captures your cat at their eye level, in good light, with an expression that feels unmistakably like them. That is the whole game, and it is easier than you think once you know the handful of moves that actually work.
Cats are not dogs. They will not sit on command, hold a pose, or cooperate just because you asked nicely. The trick is working with their rhythm instead of against it — catching them in a moment when they are calm, curious, or just awake enough to look at you without bolting. You are not staging a studio session; you are stealing a few frames when the light is right and they happen to be in the mood. No studio required, no treats-and-props routine, just you, your phone, and a little bit of patience.
By the end of this you will know exactly which photo of your cat to use — and which three to skip. You will understand why the shot with perfect focus but terrible light does not work, why cropping matters more than you realized, and how to turn that one keeper into a custom cat portrait you would actually hang. Whether you are photographing your cat for a portrait to celebrate a milestone, honor a memory, or just because you want something better than another blurry snapshot, the steps are the same: soft light, clean background, and a moment that feels like her.
Let the photo breathe. Trust me on this: the little details that sell a portrait are not the ones you force. They are the tilt of an ear, the way your cat looks when the sun hits just right, the split second before they yawn or turn away. You will know it when you see it, and once you do, you will wonder why you ever settled for anything less.
Preparing for the Photoshoot
Here is the thing about photographing your cat for a portrait: the setup matters more than the camera. You do not need a studio or fancy gear — you need a clean space, a plan for keeping your cat comfortable, and a background that lets them shine. Get these three things right and the rest falls into place.
Choose a Simple Background
Your cat is the subject, not the clutter behind them. A plain wall, a neatly made bed, or even a clean blanket draped over a chair works perfectly. Neutral tones — white, gray, soft beige — keep the focus where it belongs. Busy patterns, bright colors, or random objects pull the eye away from your cat's face, and that is the part you want people to see.
If your home does not have a plain wall, hang a sheet or use a large piece of poster board. It does not have to be perfect — just simple enough that your cat stands out.
Time It Right
Cats do not perform on command, so timing is everything. Photograph your cat when they are naturally calm — after a meal, after playtime, or during their usual lounging hours. A tired, content cat is far easier to work with than one who is wired or hungry.
Watch their mood. If they are twitchy, distracted, or already annoyed, reschedule. Forcing a session when they are not into it means blurry shots, stressed expressions, and a cat who will hide the next time you pull out your phone.
Keep Props and Distractions to a Minimum
Props rarely help. Hats, costumes, and toys might seem fun, but they usually stress your cat out or turn the portrait into a novelty shot instead of something you would actually hang. The goal is a portrait that feels like them — not a staged gimmick.
If you want to include something, keep it minimal: their favorite blanket, a subtle collar, or nothing at all. Let their personality do the work. The photo everyone gets wrong is the one where the cat is buried under props and the portrait feels like a joke instead of a keepsake.
Get Them Comfortable in the Space
Let your cat explore the area before you start shooting. Set up your background, then let them sniff around, settle in, and get used to the spot. If they associate the space with calm and safety, they will relax — and relaxed cats photograph beautifully.
Keep treats nearby, but use them sparingly. A treat can grab their attention for a second or two, but too many and they will start pacing or begging instead of sitting still. You want their attention, not their desperation.
The shot that actually works is the one where your cat forgot you were there.
Gather Your Tools
You do not need much. A phone camera is fine — good light does most of the work. If you have a DSLR or mirrorless camera, great, but do not let the lack of one stop you. What you do need: a clean lens, a plan for natural light, and patience.
Have a friend or family member nearby to help redirect your cat's attention or hold a toy just off-camera. A second pair of hands makes the process faster and less stressful for everyone.
If you are planning a custom cat portrait, preparation is half the battle. The better your setup, the better your final portrait — and the less time you spend scrolling through blurry rejects trying to find the one that works.
Lighting Techniques for Cat Portraits
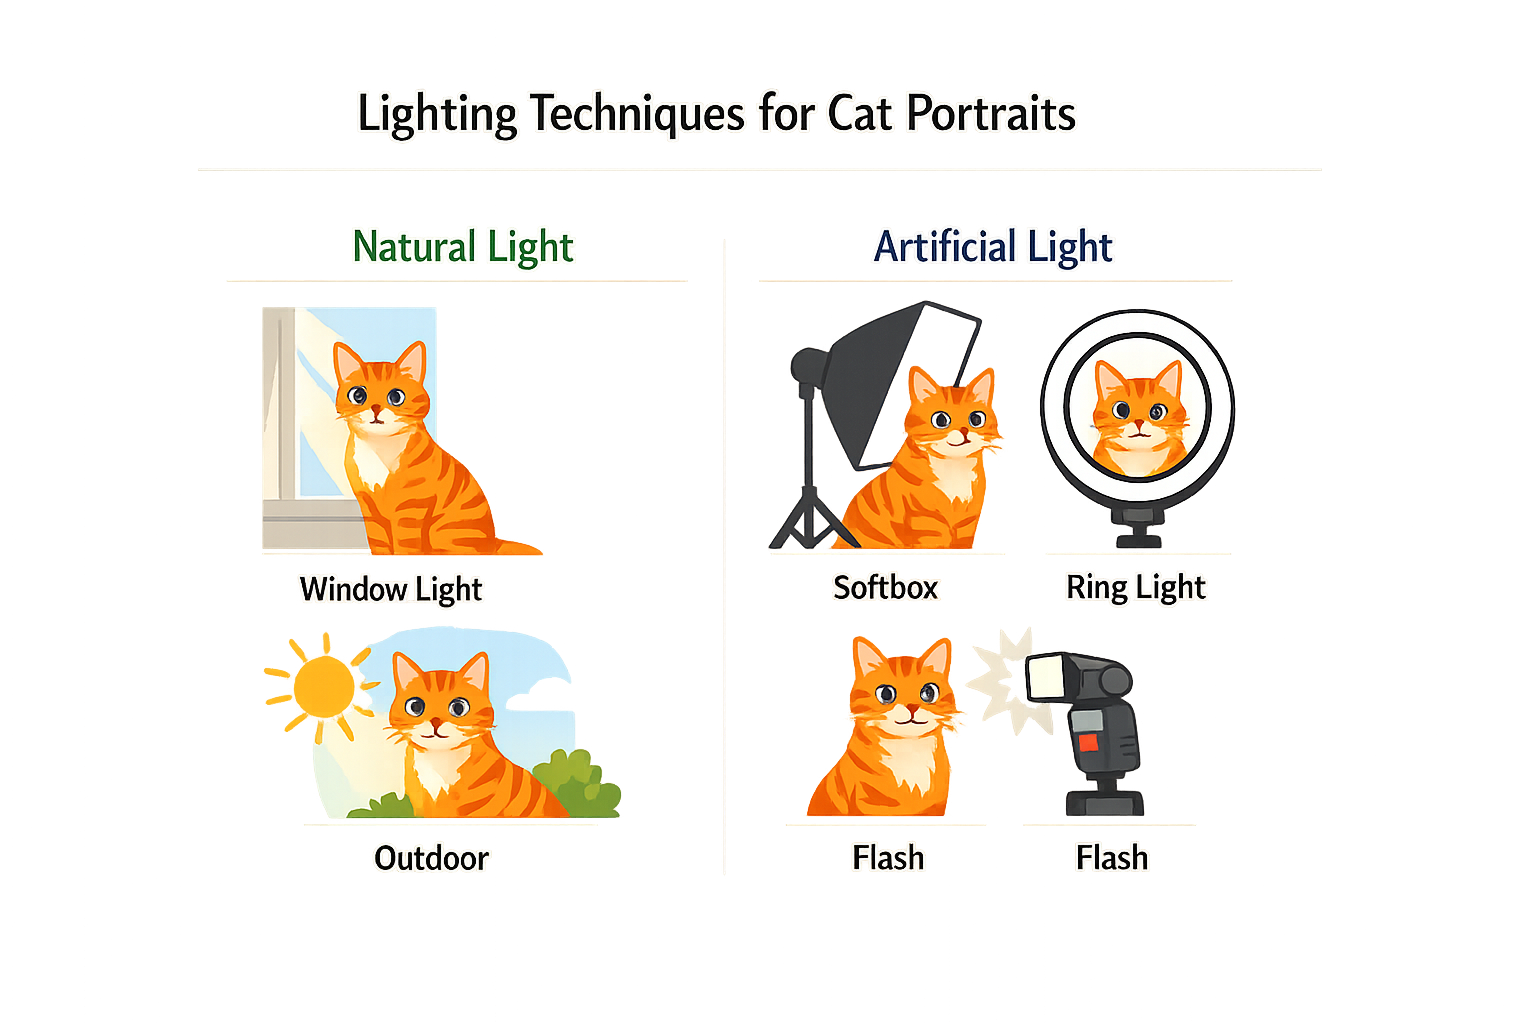
Here is the thing about light: it does most of the work. You can have the perfect pose and the right background, but if the light is wrong, the photo will feel flat or harsh. Good light makes your cat look three-dimensional, brings out the color in their eyes, and turns a snapshot into something worth hanging.
The photo everyone gets wrong is the one taken under overhead ceiling lights. That kind of light casts shadows under the chin and in the eye sockets, and it makes even the fluffiest cat look a little sinister. Natural daylight is your friend here — it is soft, it is flattering, and you already have it.
Use Natural Light Near a Window
Place your cat near a window where daylight is coming in, but not in direct sun. Direct sun creates hot spots and squinting; you want the light that bounces around the room after it comes through the glass. Mid-morning or late afternoon light is softer and warmer than the harsh midday sun. If the light is too bright, you can diffuse it with a sheer curtain or by positioning your cat a few feet back from the window.
The direction of the light matters. Side light (where the window is to the left or right of your cat) adds depth and texture, especially if your cat has long fur. Front light (where the window is behind you, facing your cat) is flattering and even, and it fills in shadows. Avoid backlighting unless you want a silhouette — it turns your cat into a dark shape with a glowing outline, which is not what you are after for a custom cat portrait.
Avoid Flash and Overhead Lighting
Flash is tempting because it is bright, but it flattens everything and creates red-eye (or in cats, that eerie green glow). It also startles most cats, which means you lose their natural expression. If you are shooting indoors and natural light is not enough, add a lamp with a warm bulb and bounce it off a wall or ceiling instead of pointing it directly at your cat. Soft, indirect light is always better than a hard blast from a flash.
Overhead lighting — the kind you get from a ceiling fixture — casts unflattering shadows and makes your cat's face look uneven. If you can, turn it off and rely on window light or a side lamp. Your cat's eyes will look brighter, and the whole photo will feel warmer.
Adjust Your Camera Settings for Low Light
If you are using a phone, it will do most of this automatically, but it helps to know what is happening. In lower light, your camera tries to compensate by slowing the shutter speed, which can blur the image if your cat moves. Tap on your cat's face on your phone screen to lock focus and exposure on them — this keeps their eyes sharp and prevents the camera from overexposing the background.
If you are using a camera with manual settings, keep your ISO as low as you can while still getting enough light, and open up the aperture (lower f-number) to let more light in. This also blurs the background, which keeps the focus on your cat's face. The sweet spot for a sharp face and a soft background is usually between f/2.8 and f/3.2, but phone cameras handle this differently — just make sure your cat's eyes are in focus.
Good light does most of the work — the rest is just keeping your cat in the frame long enough to press the button.
Trust me on this: the best portrait photos happen in the two hours after sunrise or the two hours before sunset, near a big window, with your cat doing absolutely nothing special. Let the light do the heavy lifting, and you will end up with something that actually looks like them.
Posing Your Cat
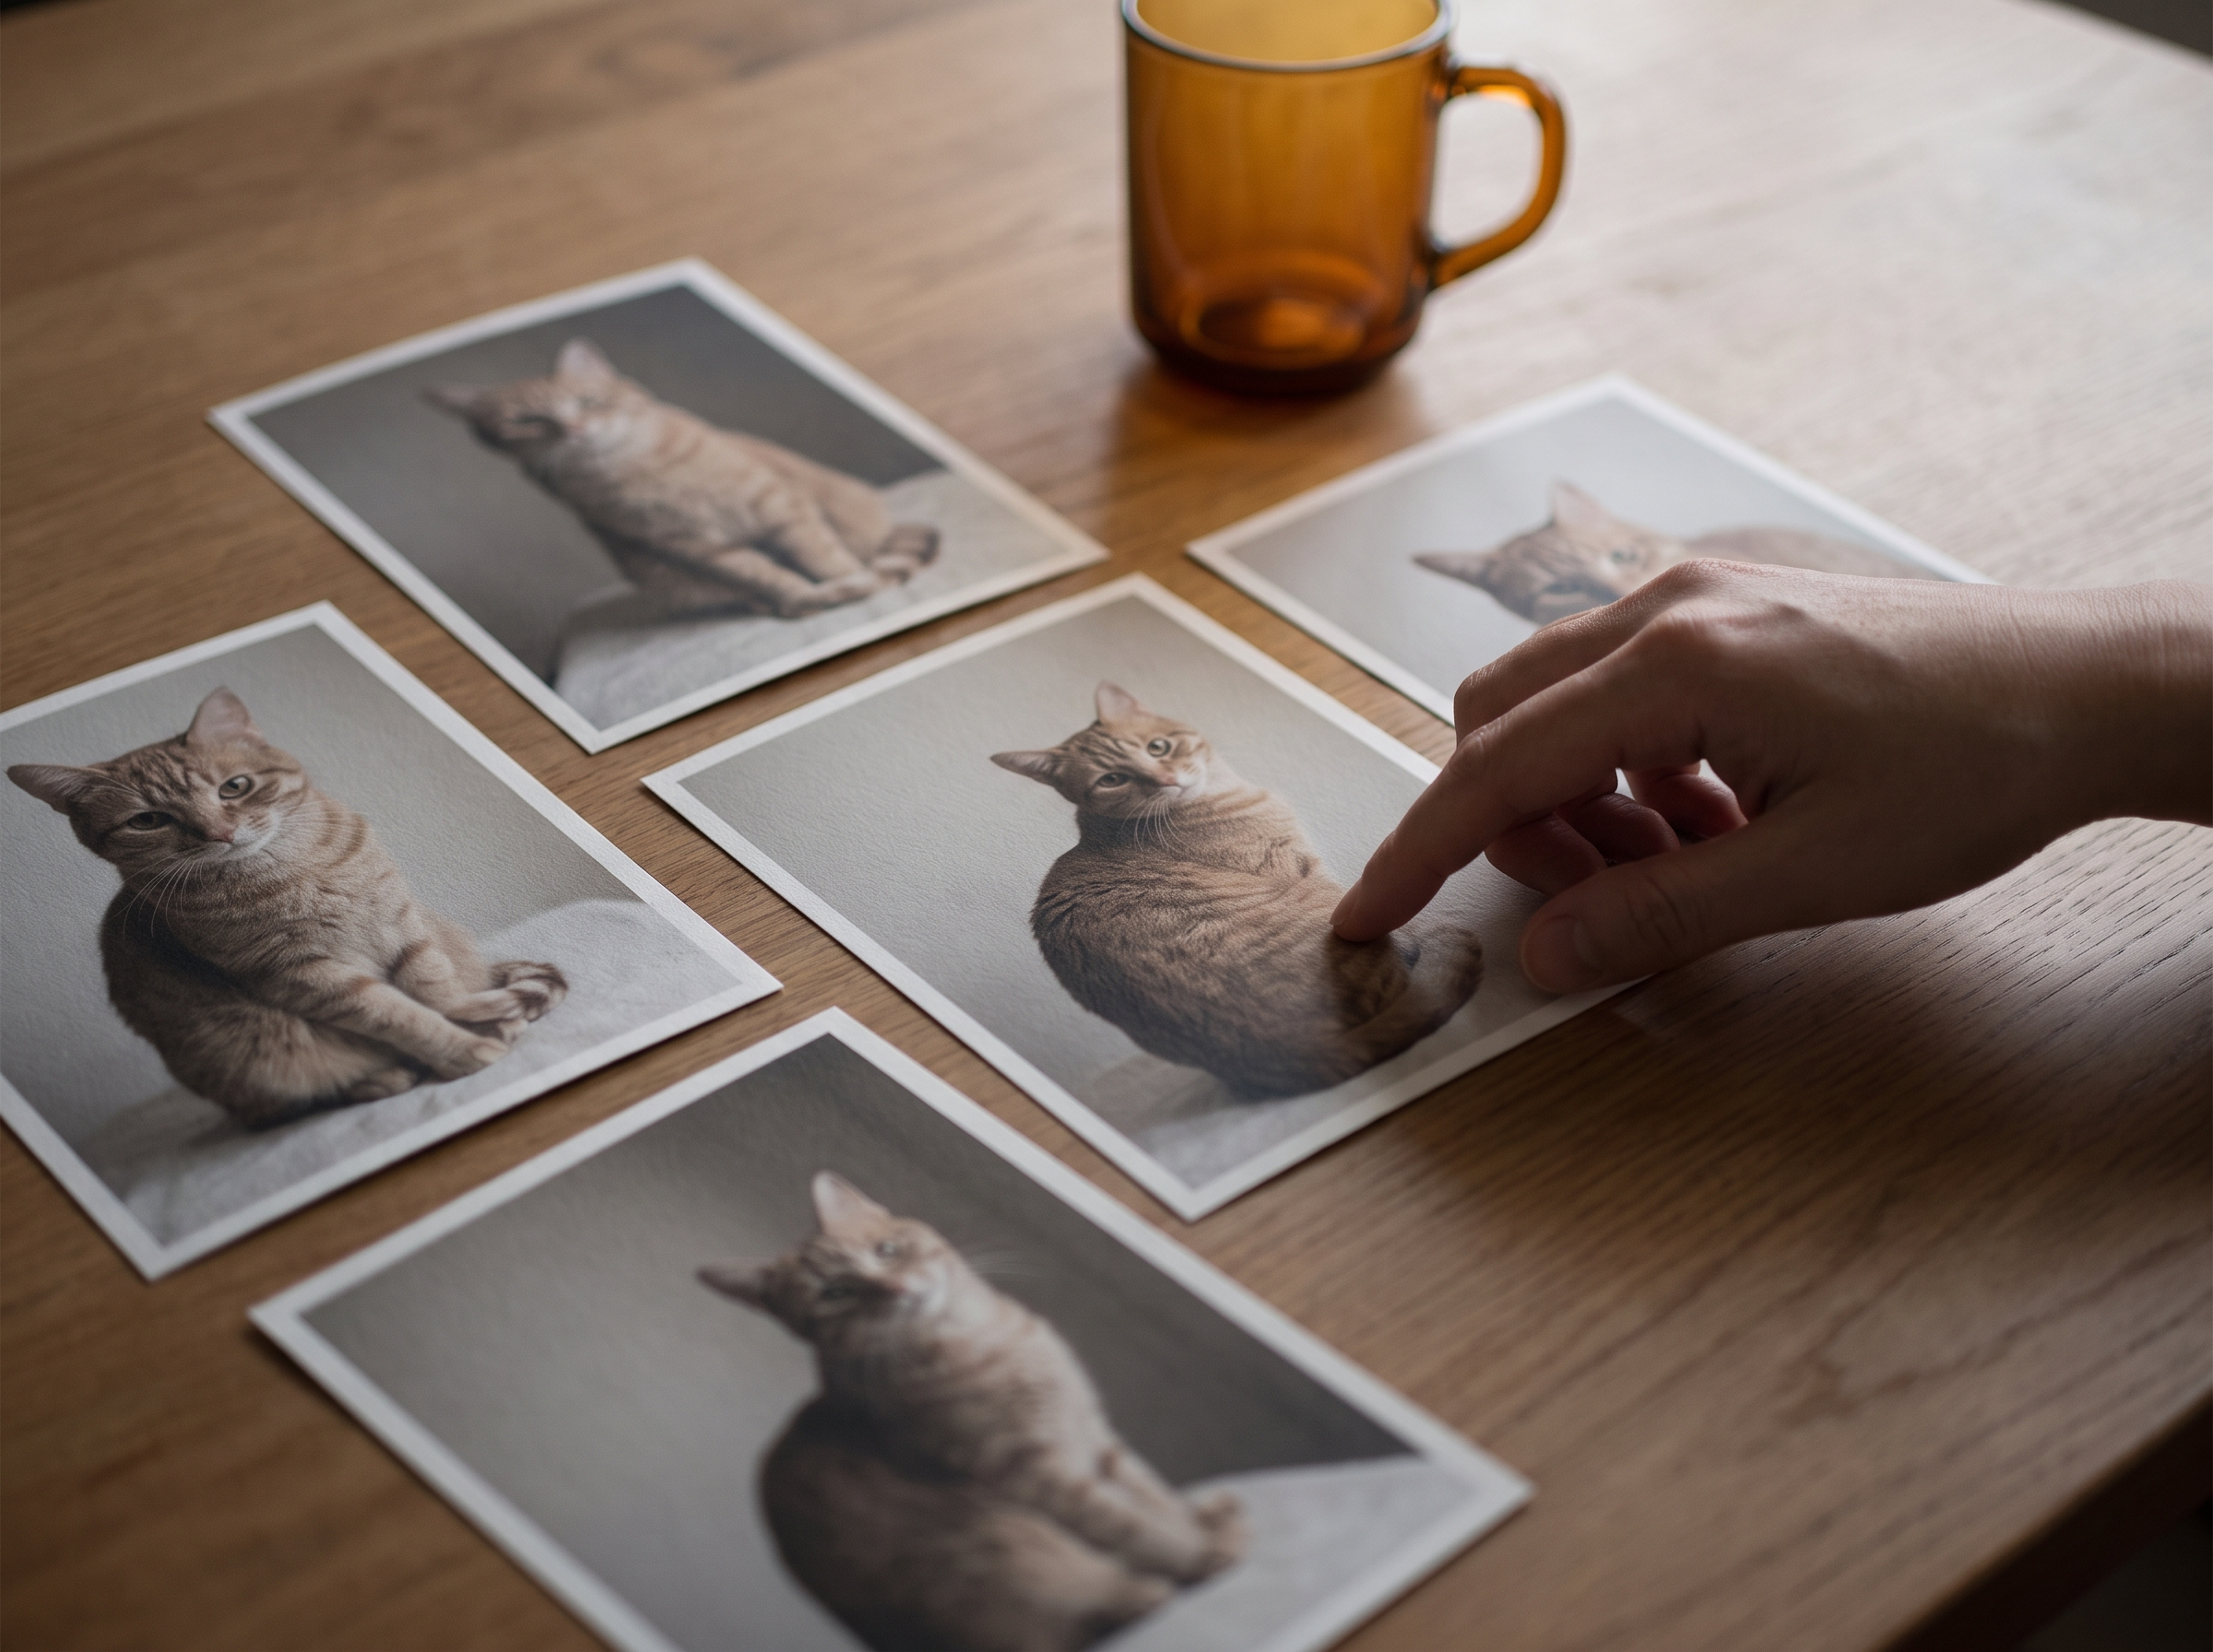
Here is the thing about posing cats: you do not. At least not the way you pose a person. Cats do what they want, when they want, and the second you try to arrange them into some magazine-worthy setup, they walk away. The trick is not forcing a pose — it is setting up conditions where the good shots happen on their own.
The photo everyone gets wrong is the one taken from standing height, looking down at the cat. It flattens their face, shrinks their eyes, and makes them look like a stranger. Get down on your cat's level. Crouch, sit, lie on the floor if you have to. Shoot at their eye level, and suddenly you have a portrait that feels like them — not a snapshot of a creature you happened to see from above.
Natural Poses Beat Forced Ones
The best cat portraits happen when your cat is doing something they already do. Lounging in their favorite window spot. Curled up on the couch. Sitting in that one patch of sun they claim every afternoon. These are the moments that actually look like your cat, and they are worth hanging because they feel real.
Sleeping close-ups are effortlessly cute and require zero cooperation. If your cat is napping in good light, move in close and shoot their face, their paws tucked under their chin, the way their ears twitch in their sleep. You will get a shot that is soft, warm, and a little dramatic without any of the fight.
Work With Their Personality, Not Against It
Some cats are natural performers. They look at the camera, they hold still, they give you that regal stare that belongs in a Renaissance painting. If that is your cat, great — set them up in good light, let them settle, and shoot.
Most cats are not that cat. Most cats ignore you, walk away mid-shoot, or give you their back the second you pull out the phone. For them, the trick is patience and bribery. A treat, a favorite toy, a crinkly bag — anything that gets their attention for three seconds is enough. You are not looking for cooperation. You are looking for one moment where they pause, look, and give you their face.
You do not need a perfect pose — you need the one where their ears are forward and their eyes are clear.
Avoid forcing your cat into a position they hate. If they do not like being held, do not hold them for the photo. If they bolt when you move too close, back up and use zoom. A stressed cat does not photograph well, and you will see it in their face — flat ears, wide eyes, that look that says they are about to run. Let them be comfortable, and the shot will look better for it.
Framing and Headroom
Once you have the pose — or the moment that passes for one — think about framing. Leave a little breathing room around your cat. Do not crop so tight that their ears are cut off or their whiskers are clipped. Let the photo breathe.
For a portrait you might turn into a painting, aim for a clear, uncluttered shot where your cat is the focus. Their face should be sharp, their eyes in focus, and the background should not compete for attention. If you are shooting a close-up, fill the frame with their face. If you are shooting a full-body pose, make sure there is space around them so they do not feel cramped in the shot.
If you are planning to create a custom cat portrait from your photo, a well-framed shot with good headroom and a clear expression will convert beautifully into a painted piece worth hanging.
This is the part people skip: checking the frame before they shoot. Take an extra second. Make sure the angle is right, the light is hitting their face, and you are not cutting off anything important. That one extra second is the difference between a snapshot and a portrait.
Editing Your Photos
Here is the thing: editing is not about fixing a bad photo. It is about making a good photo even better. If the shot does not work before you open the editor, no amount of tweaking will save it. But when you start with a solid image — good light, sharp focus, your cat looking like herself — a few simple adjustments can turn it into something worth hanging.
Keep It Natural
The goal is to enhance what is already there, not to create something that looks nothing like your cat. Resist the urge to crank up the saturation until her orange tabby coat glows neon. Real portraits breathe. They feel like the animal you know, not a cartoon version of her.
Start with exposure and contrast. If the photo is a little dark, bring up the shadows gently. If it is washed out, pull down the highlights. Small moves. You will know you have gone too far when the image starts to look artificial.
Crop for Composition
Cropping is one of the most powerful edits you can make, and it costs you nothing. The photo you took might have too much empty space around your cat, or her face might be off-center in a way that feels awkward. Fix it.
Bring the frame in closer so her eyes are in the upper third of the image. Leave a little headroom — not too much, not too little. Let the photo breathe, but do not let distractions steal the show. If there is a stray toy or a corner of the litter box creeping into the edge, crop it out.
For a custom cat portrait, you want the focus tight on her face and expression. The less clutter, the better the final painting will look.
Adjust Color and Warmth
Cats come in every color, and sometimes your phone camera does not quite capture the richness of their coat. A small shift in warmth can make a huge difference. If the photo feels too blue or cold, add a touch of warmth. If it is too yellow, cool it down slightly.
Do not overdo it. The goal is to match what you see when you look at your cat in person, not to invent a new color palette. Her eyes should look clear and bright, her fur should look soft, and the overall tone should feel like her.
Good editing makes the photo feel more like your cat, not less.
Sharpen Sparingly
A little sharpening can bring out detail in her whiskers and eyes, but too much will make the image look harsh and grainy. If you are working on a phone, apply sharpening at 10-20% and stop. If the photo was blurry to begin with, sharpening will not fix it — it will just make the blur more obvious.
The one you keep coming back to is usually the one that needs the least work. Trust that instinct.
Conclusion
Here is the thing about photographing your cat for a portrait: it does not have to be perfect. The photo you keep coming back to — the one where the light caught her just right, or where she looked at you like she knew something you did not — that is the one worth hanging. You do not need a studio or fancy gear. You just need good light, a little patience, and the willingness to work with your cat instead of against her.
The tips in this guide — soft natural light, getting down to their eye level, letting them settle into their own rhythm — these are the fundamentals that make the difference between a snapshot and a portrait. Trust me on this: the photo everyone gets wrong is the one where they try to force it. Cats do not perform on command. They collaborate when the conditions feel right.
This isn't about making cats comply. It's about collaborating with them.
Now you know which window to use, which angle flatters them, and how to keep the background from stealing the show. You know that the shot that actually works is usually the one you took after you stopped trying so hard. Go take a few dozen photos this week. Let the photo breathe. Keep them in the room with you, not performing for you. One of those frames will be the one you turn into a custom cat portrait that looks like her — not a stranger who happens to have her collar.
The little details that sell it are already in your phone. You will know it when you see it.
Learn essential tips and techniques for capturing stunning cat portrait photos that showcase your feline's personality.