
Introduction
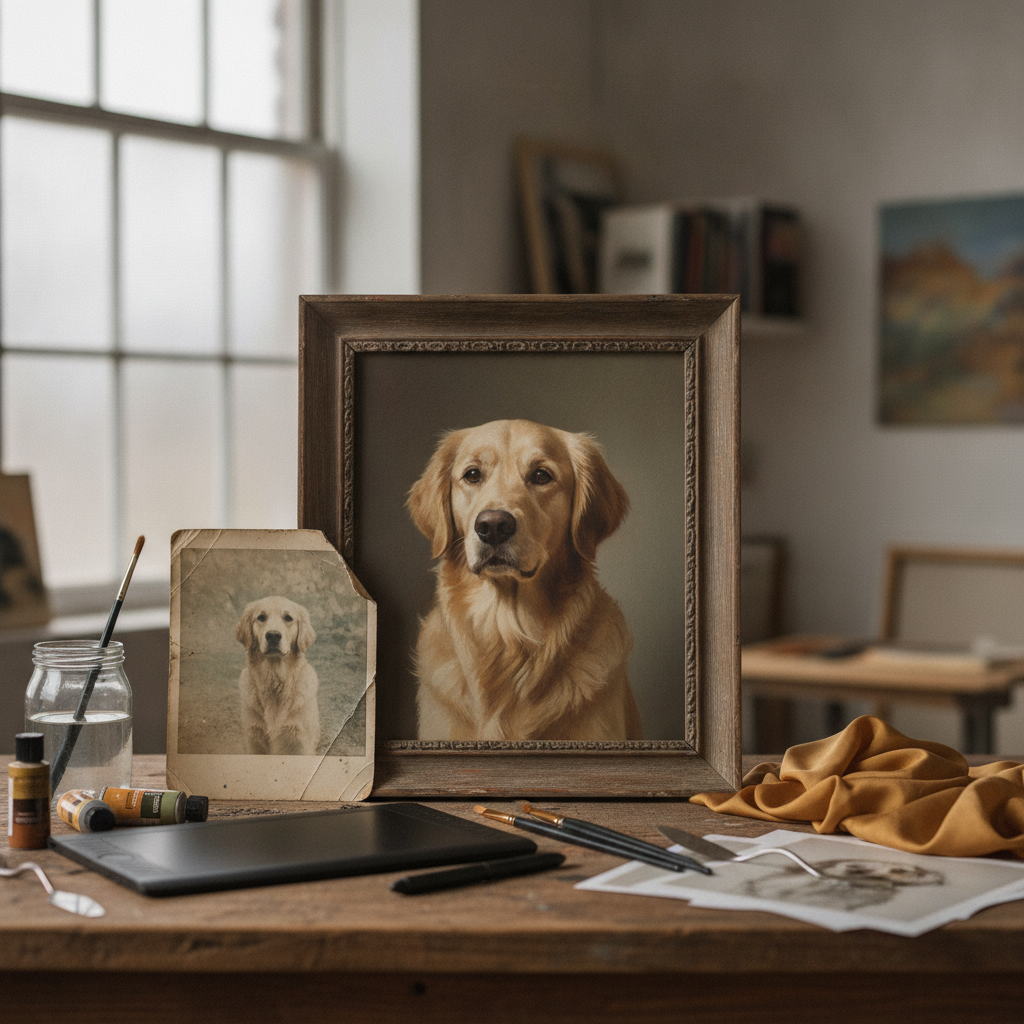
Using an old or printed photo for a pet portrait is simpler than most people think. That faded snapshot from fifteen years ago, the creased print in your drawer, or the photo you keep coming back to — those images can become wall-worthy art. The key is knowing how to prepare them and what to expect from the process.
Here is the thing about old photos: the one you keep coming back to — the shot where your dog looks exactly like himself, or the printed snapshot that still makes you smile — that is the photo that belongs on your wall. It does not matter if it is creased, faded, or living in a shoebox. If it captures the spirit of your pet, it is worth turning into a portrait.
Most people assume they need a perfect, high-resolution digital file to create a pet portrait. They skip over the printed photo tucked in a drawer or the scanned image from a disposable camera because they think it will not work. Trust me on this: those photos — the ones with a little wear, a little history — often make the most meaningful portraits. The trick is knowing how to prepare them and what to expect.
This guide walks you through using an old or printed photo for a pet portrait, from choosing the right image to understanding what will translate well into Renaissance and classical pet portraits or other painted styles. By the end, you will know exactly which photo to use and how to get it ready — no studio required.
The photo everyone gets wrong is the one they think looks "too old" or "not good enough." If the expression is right, if the light shows their face clearly, and if you can see their eyes — you have what you need. Let me show you how to make it work.
What Makes Using an Old or Printed Photo for a Pet Portrait Difficult?
Here is the thing about old photos: the one you treasure is almost never the one that translates cleanly into a portrait. That faded print from 1998, the creased Polaroid, the scanned image your aunt emailed you — they all carry something precious, but they also carry problems. Fading, grain, color shifts, physical damage. The photo that makes you smile when you pull it from the drawer might look rough when you try to blow it up or convert it into painted art.
Why Old Photos Struggle
Most old printed photos were not stored with longevity in mind. They sat in albums, shoeboxes, or wallets. Light, heat, and humidity did their work. Concerns about permanence and stability have always been part of the history of photography — even photographers in the 1800s watched their images fade within a decade. Your printed photo from twenty or thirty years ago is fighting the same battle: colors wash out, details blur, contrast flattens. What looked sharp to your eye in the moment now looks soft, yellowed, or grainy when you scan it.
Then there is the resolution problem. Most prints were made for a 4×6 frame, not for enlargement. When you scan an old photo, you are working with whatever detail the print captured — and if that print was made from a disposable camera or an early digital file, the detail was never there to begin with. Low resolution means soft edges, pixelation, and a lack of the crisp information a portrait artist (or portrait software) needs to render fur, eyes, and expression convincingly.
Physical Damage and Handling
Old photos crack, crease, and tear. They get fingerprints, water stains, and corner dings. If the photo lived in a wallet or a purse, it probably has a white crease right through your dog's face. If it sat in a frame on a sunny windowsill, one half might be lighter than the other. These are fixable problems — but they add steps, and they mean the photo you are starting with is already compromised.
The emotional weight makes it harder. You want to use that photo because it is the one you remember, the one that was on the fridge, the one your mom took. But sentiment does not fix fading or fill in missing pixels. The photo everyone gets wrong is the one they love too much to see clearly. You have to decide whether the memory is worth the extra work — or whether another shot of the same pet, taken around the same time, might actually give you a portrait worth hanging.
The photo you love and the photo that makes a great portrait are not always the same photo.
If you are committed to using an old or printed photo for a pet portrait, you can make it work — but you need to know what you are up against. Fading, low resolution, and physical damage are not deal-breakers, but they do mean you will need to choose your portrait style carefully and set your expectations accordingly. Some styles hide flaws better than others, and some photos are simply too far gone to rescue. The next section will walk you through the steps to get the best result from whatever you have got.
Steps to Create a Pet Portrait from an Old Photo
Here is the thing: turning an old photo into a portrait worth hanging is not about magic — it is about working with what you have and knowing which steps actually matter. The photo does not have to be perfect. It just has to give you enough of your pet to work with.
Step 1: Choose the Right Photo
Start by picking the photo you keep coming back to — the one that feels like them. Look for a shot where their face is clear, their eyes are visible, and the expression is the one you remember. Blurry backgrounds are fine. A little grain is fine. What you need is a recognizable face and enough detail that you can see their personality.
If you are working with a printed photo, handle it carefully. Skin oils and perspiration can damage the surface, so if you have nitrile gloves, use them — or just wash your hands first and hold the photo by the edges.
Step 1
Select the photo
Pick the image that captures your pet's personality. Clear face and visible eyes matter more than perfect lighting or a clean background. Handle printed photos by the edges to avoid surface damage.
Step 2: Scan or Photograph the Print
If your photo is printed, you need to get it into digital form. A flatbed scanner is ideal — it keeps the photo flat and captures detail evenly. If you do not have a scanner, photograph the print in good natural light. Lay it on a flat surface, shoot straight down, and avoid glare. The goal is a clear, even image you can send for conversion.
For faded or damaged prints, do not worry about fixing everything yourself. A good portrait service will work with what you send — they are used to seeing photos with creases, discoloration, and missing corners.
Step 2
Digitize the print
Use a flatbed scanner if available, or photograph the print in natural light on a flat surface. Shoot straight down to avoid distortion and glare. Do not stress about fading or damage — that gets handled in the portrait process.
Step 3: Decide on a Portrait Style
This is where you choose the era and the mood. Renaissance and classical pet portraits give you that old-master look — soft, warm, and a little dramatic. Victorian styles add lace and formality. Regal portraits put your pet in uniform or regalia. The style you pick should feel like it fits their personality, not just what looks impressive.
For older photos, styles with softer edges and painted textures tend to work better than ultra-sharp modern looks. Let the photo breathe — a painted portrait can smooth over imperfections in the original image while keeping the details that matter. If you want to turn your pet photo into art, understanding these style differences helps you choose wisely.
Step 3
Pick the style
Choose a portrait style that matches your pet's personality and the photo's condition. Softer, painted styles like Renaissance or Victorian work well with older images, smoothing imperfections while preserving character.
Step 4: Provide Context and Preferences
When you send the photo, include any details that will help the portrait feel right. If the photo is faded and their coat was darker, say so. If you want them looking left instead of right, mention it. If there is a specific background color or setting that would make it feel more like them, share that too.
This is the part people skip, and it shows. The little details that sell it — the tilt of their head, the way their ears sat, the color you remember — those come from you, not the photo.
Step 4
Add your input
Share details the photo does not show: coat color if faded, preferred orientation, background preferences, or anything that makes the portrait feel accurate. These details turn a generic rendering into something that looks like your pet.
Step 5: Review and Finalize
Once you see the portrait, check it against your memory, not just the photo. Does it feel like them? Are their eyes at the right level? Does the expression match what you remember? If something is off — the ears, the markings, the tilt of the head — say so. A good portrait is worth the back-and-forth to get it right.
When it does feel right, you will know it. That is the one you frame. How long does a custom painting take? Typically 1-3 weeks depending on the style and revisions, so plan accordingly if you are working toward a specific date.
Step 5
Review the result
Compare the portrait to your memory, not just the original photo. Check expression, eye level, and details like markings or ear position. If something feels off, ask for adjustments — the portrait should feel like them, not just look like the photo.
Tips and Tricks for Success
Here is the thing about old photos: the ones that make the best portraits are rarely the sharpest or the most technically perfect. They are the ones where you can see your pet — their expression, their posture, the way they held themselves. That matters more than grain or fading.
Choose the Photo You Keep Coming Back To
Trust your gut. If you have three photos from the same afternoon and one keeps pulling you back, that is the one. It does not have to be the clearest or the best-lit. It has to feel like them. The little details that sell it — the tilt of their head, the softness in their eyes — those translate into a portrait worth hanging even when the original is grainy or yellowed.
Handle and Store Printed Photos with Care
If you are working from a printed photo, treat it gently. Skin oils and dirt transfer easily to old prints, so handle them by the edges or wear clean cotton gloves. Store prints flat in a cool, dry place away from direct sunlight. Even a few hours of strong light can fade an already fragile image further.
When you are ready to scan or photograph the print, lay it on a flat, neutral-colored surface under even, indirect light. Avoid using a flash — it creates glare and washes out detail. Natural light near a window (not in direct sun) does most of the work.
Work with What You Have, Not What You Wish You Had
You cannot add detail that is not there, but you can work around it. If the background is busy or damaged, a good portrait artist will simplify or remove it entirely. If the photo is small or low-resolution, choose a painted style rather than a photorealistic one — Renaissance and classical pet portraits are especially forgiving because the brushwork and texture naturally soften imperfections.
The era you choose matters less than whether the style lets the photo breathe.
Watercolor and oil-painted styles hide grain and color shifts better than styles that try to replicate every pixel. Let the medium do the heavy lifting.
Communicate Clearly About the Photo's Condition
When you submit the photo, mention any damage, fading, or missing areas up front. A good artist can work around tears, creases, or discoloration, but they need to know what they are dealing with. If one ear is obscured or the color has shifted to sepia, say so. It saves time and ensures the final portrait reflects what you actually want.
If you have multiple photos of the same pet — even if they are from different years — share them. An artist can use a second photo as a reference for an ear shape, eye color, or posture detail that is unclear in the primary image.
Preserve the Original After Scanning
Once you have scanned or photographed the print, store the original carefully. Use acid-free, lignin-free paper enclosures if you are archiving it long-term. Buffered enclosures can damage certain types of prints, so unbuffered storage is safer for older color photographs. The term "archival" implies long-term stability, but it is worth confirming what makes a storage product truly archival rather than assuming.
Frequently asked questions
Can I use a faded or damaged photo for a pet portrait?
Yes. Faded, creased, or damaged photos can still work for painted portraits. Styles like Renaissance, Victorian, or watercolor portraits smooth over imperfections while preserving your pet's expression and personality. Communicate the photo's condition up front so the artist knows what to expect.
What resolution do I need when scanning an old printed photo?
Scan at 600 dpi or higher if possible. Higher resolution gives the artist more detail to work with, especially in fur texture, eyes, and shadows. If you are photographing the print instead, use good natural light and shoot straight down to avoid glare and distortion.
How do I choose between multiple old photos of the same pet?
Pick the photo you keep coming back to — the one where their expression feels right. Clear eyes and a recognizable face matter more than technical quality. If you have multiple photos from the same period, share them all; an artist can use secondary images as reference for details that are unclear in the primary shot.
What portrait style works best for low-quality or grainy photos?
Painted styles like Renaissance, Victorian, or watercolor work best for low-resolution or grainy photos. The brushwork and texture naturally soften imperfections, while photorealistic styles amplify flaws. Choose a style that lets the photo breathe rather than replicating every pixel.
Should I edit the photo myself before submitting it?
No. Send the original scan or photograph as-is. A professional portrait service is used to working with faded, damaged, or discolored images. Over-editing can remove details the artist needs. Instead, describe what you remember (coat color, markings, etc.) and let the artist handle the rest.
Conclusion
Here is the thing: that faded photo tucked in a drawer or stuck to your fridge is not just a memory — it is the starting point for something you will actually want to hang. Using an old or printed photo for a pet portrait is not about having the perfect shot. It is about having the one you keep coming back to, the one that feels like them.
You do not need a professional camera or a studio setup. You need good light, a clean scan or re-photograph, and a little patience with the details that sell it — the expression, the crop, the era you choose. The photo everyone gets wrong is the one they love but never prepare. A quick scan, a steady hand, and some basic cleanup will get you 90% of the way there.
If you are thinking about turning that old snapshot into a Renaissance or classical portrait, or just want something soft, warm, and a little dramatic on your wall, trust me on this: the photo does not have to be perfect. It just has to be theirs. Go find that box of prints. You will know it when you see it.